Setting up UDM Pro to only use TLS 1.2
This article is a step-by-step guide to configure UDM Pro to only use TLS 1.2.
Instructions
On-premise users will need to make the changes to both the Server and the Bridge. Enoten Cloud users will only need to make the change to the UDM Pro Bridge.
IMPORTANT
Make sure your installation is on the following versions or above before making the below changes:
UDM Pro Server: v2.1.1
UDM Pro Bridge: v2.1.2
Bridge (On-prem and Enoten Cloud):
An SSL certificate with its private key will need to be uploaded under the Bridge settings section of the Bridge Configuration Manager to enable the use of TLS 1.2.
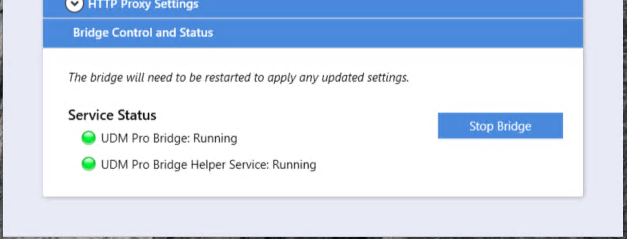
- Open the UDM Pro Bridge Configuration Manager and stop the bridge.
- Open the file explorer and navigate to C:\ProgramData\Event Zero\UDM Pro Bridge.
- Open the Properties.ini file in a text editor of your choice.
Add the following lines into the properties.ini file:
#SSL protocol to use.
server.ssl.protocol=TLS

#Enabled SSL protocols.
server.ssl.enabled-protocols=TLSv1.2
SSL_TLS_VERSIONS=1.2
- (OPTIONAL) If you would like to specify the Ciphers to be use then the following variable will also need to be added:
#ssl ciphers
server.ssl.ciphers=INCLUDE_ANY_CIPHERS_YOU_NEED_TO_SUPPORT
Note: The following ciphers are set by default on the UDM Pro bridge if the above variable is not added: ECDHE-ECDSA-CHACHA20-POLY1305:ECDHE-RSA-CHACHA20-POLY1305:ECDHE-ECDSA-AES128-GCM-SHA256:ECDHE-RSA-AES128-GCM-SHA256:ECDHE-ECDSA-AES256-GCM-SHA384:ECDHE-RSA-AES256-GCM-SHA384:DHE-RSA-AES128-GCM-SHA256:DHE-RSA-AES256-GCM-SHA384:ECDHE-ECDSA-AES128-SHA256:ECDHE-RSA-AES128-SHA256:ECDHE-ECDSA-AES128-SHA:ECDHE-RSA-AES256-SHA384:ECDHE-RSA-AES128-SHA:ECDHE-ECDSA-AES256-SHA384:ECDHE-ECDSA-AES256-SHA:ECDHE-RSA-AES256-SHA:DHE-RSA-AES128-SHA256:DHE-RSA-AES128-SHA:DHE-RSA-AES256-SHA256:DHE-RSA-AES256-SHA:ECDHE-ECDSA-DES-CBC3-SHA:ECDHE-RSA-DES-CBC3-SHA:EDH-RSA-DES-CBC3-SHA:AES128-GCM-SHA256:AES256-GCM-SHA384:AES128-SHA256:AES256-SHA256:AES128-SHA:AES256-SHA:DES-CBC3-SHA:!DSS - Start the Bridge on the UDM Pro Bridge Configuration Manger.
UDM Pro Server (On-prem only):
- Open server.msc on the server running UDM Pro and Stop the UDM Pro Server service.
- Open the file explorer and navigate to C:\ProgramData\Event Zero\UDM Pro Bridge.
- Open the Properties.ini file in a text editor of your choice.
- Add the following lines into the properties.ini file:
#SSL protocol to use.
server.ssl.protocol=TLS
#Enabled SSL protocols.
server.ssl.enabled-protocols=TLSv1.2 - (OPTIONAL) If you would like to specify the Ciphers to be use then the following variable will also need to be added:
#ssl ciphers
server.ssl.ciphers=INCLUDE_ANY_CIPHERS_YOU_NEED_TO_SUPPORT - Start the UDM Pro Server service on services.msc.
Testing:
Run through the following steps to make sure that the UDM Pro Bridge is still connected to the UDM Pro Server/Tenant.
- Checking the connection between the server and the bridge:
- Open a browser and navigate to UDM Pro.
- Log in with your admin credentials.
- Navigate to Bridges and make sure the last seen time for the bridge is within a few seconds. You may have to refresh the page a couple of times to make sure that is the case.
- Checking the connection between the devices and the bridge.
- Restart a phone either through UDM Pro or manually.
- Once the phone is back up, make sure the last seen time for the device is within a few seconds. You may have to refresh the page a couple of times to make sure that is the case.
Related articles